Friday, November 1, 2013

2013: How It Went (Halloween)

Comparison to the manga version of Near.


Hi! Hope you all had a great Halloween!
So, time for the review of last night! :D I'll only do the Near costume, because I don't have all the details about my brother's Deathstroke costume (he wasn't trick-or-treating, he just stood around, looking cool.)
Near loves his toys!
Recognition: 2/10

This was as expected. The only person who knew who I was was one of my friend's friend's friends (I know, complicated, right?), who had happened to watch Death Note till the end.
I did get a lot of "who are you?", to which I usually answered "an anime character", and people knew what that was.
I did get a really great guess, though: Andy Warhol! I laughed a lot about that :D


Strength: 9/10
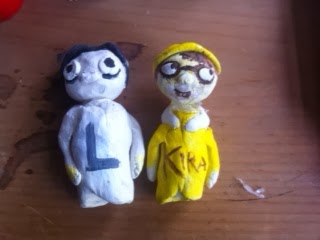
Closeup of the L puppet.
So, this costume held up very well, seeing as it was raining, the only problem I had was that the puppets started tuning back into clay... so... yeah, but I think if I had used Fimo, it would have worked.

Comfort: 9/10

This costume might have been the most comfortable I've had yet. The only uncomfortable thing about it was that my hands got very cold, and almost numb. I can't really think of a solution to that, though, so, all's good!
Here he is!

Candy Rating: 3/10
As I've said before, I don't really go trick-or-treating because of the candy, but I did discover that I liked Smarties more this year, so I guess that's a strong point. Also, lots of chocolate, and I love chocolate!!

So, yeah. This year was a really great year. And I'm already thinking about who I'm going to be next year, so expect a post in late 2014 about that! Yay!

Oh, yeah, and that is a picture of Deathstroke.

I hope I inspired you to make your costume!

Happy Halloween!

Wednesday, October 30, 2013

Deathstroke: Armor (plus a small Near update)

The chest armor in-progress
There is a lot of armor on Deathstroke, so I'm not going to go into complete detail, but I will provide you with some (hopefully) helpful insights.

The basic idea is to cut out a whole lot of shapes from craft foam to fit your body, using the original reference as a model.

The ammo is made from corks with mesh straps glued to them, and the belt and "suspenders" are made from straps too.

Here is the pattern for the pouches
The pouches
The pants are jeans, but you should probably get them in black, because we tried painting these and it didn't work so well (we had no black jeans at that time) but they should be scrap jeans because you have to glue all the parts to them and the shirt.

The pouches are actually made from one piece of black
foam that is cleverly folded to look like a pouch. It doesn't have a back, but who's going to see that anyway? So, it's cool. You can use the pattern to the right for reference. Then, you put a little bit of mesh strap through the hole in the top and there you have it.


So, if you follow this method, you can basically create all the armor.

And now for the...

Near Update: The Puppets

So, here are the puppets:          
  I made them out of Das polymer air-dry clay, and they turned out pretty well, but I wouldn't recommend using Das. It's very soft, and doesn't keep it's shape, it also doesn't stick to itself very well, so that posed a problem.
But I still like the result, so all's well that ends well.


I can't wait for tomorrow. Can you? :D


Deathstroke: The Mask and Bo Staff

Hi! Finally, a post for Deathstroke. Sorry about the wait, I know it's a little late now for this Halloween.
Hopefully, you're looking at this post after 2013's Halloween!
Anyway.

The Over Mask
The finished mask.

This is the orange and black part of the mask that looks like a mask. You will basically only see this part in the finished thing.

You will need:
  • 1/4 inch thick white craft foam
  • Thin black craft foam
  • X-Acto knife
  • Black paint
  • Orange paint

Draw a pattern on the foam for the mask using the picture to the left as reference. You can make one out of paper first, to get the measurements correct. Cut out the foam using the knife and make sure it works properly.

Cut out a small square of black foam and glue inside the mask under the mouth holes. Do the same for the eye, but cut out an eye hole first. Make sure you can see the black foam, though, as this gives the impression of a more 3D look!


Paint over the mask using the orange paint first. Use tape to make the line clear and straight between the transition. Do the same with the black.

Voila! You have completed step 1.


The Under Mask


You will need:
  • Half a yard of black cloth, preferably stretchy
  • Strip of orange cloth
Take the black cloth and fold in half over your head. Take the corners that stick out and tape them flat to the back of the mask. Continue to take the loose flaps and tape them down, keeping in mind that your head needs to be able to slip out of it. Glue all taped flaps down, then remove tape.

Take the strip of orange cloth and tie a knot in it like a ninja headband. Using the foam over mask as reference, glue the strip to the under mask to look like it's coming out from the over mask (and make sure to read that sentence carefully so you don't get the under mask and the over mask confused :D)

Cut an eye hole in the under mask where the eye will go. You might want to tape the over mask to it temporarily for placement.

Fasten together with desired method. You are done with the mask!
The Bo's end, wrapped with duct tape

The Bo

You will need:
  • Metal or plastic black broom handle
  • Duct tape 
  • Black craft foam
 Take the craft foam and wrap it around the middle of the broom handle, then cut so that it fits snugly over it. Glue or tape on. Wrap the ends of it in duct tape for a cool "wrapped" look. 
Take a couple swings at an imaginary enemy. Now you are done!

Hope you all have a great Halloween! See you next time!


Friday, September 27, 2013

Near: The Pants

Me wearing the pants.
Hello!

So I ordered these scrub pants (I had read online in a forum that scrub pants would work for Near), and they are pretty great: Click here for the link!

When I first opened the package, I thought they'd be too big, but they actually aren't (the drawstring's a bit big, but I just have to wrap the drawstring around the back and tie it there, heheh)
The pants laid flat.
There is a lost of baggy-ness around the waist on me, but the shirt is long enough to hide it, so I wouldn't worry too much about that.

So, anyway, if you think they're too big, just double check.

They're also very good because they're somewhat baggy so if it's cold on Halloween, you could wear pants underneath, provided that they stick close to your body. In the picture, I am actually wearing jeans underneath them.

So, yeah, that's pretty much it for the "costume" part of the Near costume. If you want to wear a shirt underneath the button-up one, I suggest maybe wearing a v-neck because I tried wearing a crew-neck one, and you can see it peeking out of the top (Near unbuttons the top button of his pajamas.)

Yeah! Next time on the Near costume: Finger puppets! Yay...?


(P.S.: Sorry about not posting about the Deathstroke costume, my brother hasn't really done much, we still need to get the foam, and I want a nice, long post about that costume! :D)

Monday, September 23, 2013

Near: The Shirt

Hello!
So, I looked all over for a pair of white pajamas under $20, to be as authentic as possible (and also because I need pajamas and thought, Hey! I could save money this way! :P) Unfortunately, the cheapest pair was around $85. This got me really annoyed, because white should be the cheapest color, not the most expensive.
Anyway, so that didn't work. Time for plan B.

The Pajama Shirt
Near wears white pajamas in the actual manga, but I think I can fake it pretty well by using a white dress shirt.
I would get one around 1-2 sizes too big, to add baggy-ness.
If your shirt has a pocket, you have encountered the problem I had (Near doesn't have a pocket,) but do not despair!

You will need:

  • A white dress shirt 1-2 sizes too big w/ pocket.
  • A seam ripper.
Take the corner of the pocket and hook the tip of the seam ripper under the thread of the seam. Pull
Take the corner and slide the
seam ripper  under the thread.
The small holes.
up. Repeat several times with the rest of the corner until you can pull and unravel part of it. Repeat.

When you're done, and the pocket is off, you may notice some very small perforations. I don't know how to get rid of these, I might try ironing it, but I don't think it's very noticeable from a distance, so I wouldn't worry too much.

Alright! That's it for today! I hope you are having a great fall so far!


Friday, September 6, 2013

2013's Costume: Near/Deathstroke

Okay, so you might have seen a post before about how I'm going to be Red, but as a last-minute change of  mind, I decided that I'd rather be Near from the manga and anime Death Note.

So, if you were looking forward to that, sorry.

Near's costume is not very complicated, so I decided to make up for that by also doing tutorials on my brother's costume, which is much more complicated. He is going as Deathstroke, a.k.a. Slade Wilson, from DC comics.

I might not post for a while because my brother needs to get some craft foam (yay! We all know how much I love that!) for his armor. A LOT of craft foam.

Anyway, happy....September!