Thursday, November 1, 2018

2018: How It Went (Halloween)

Halloween Pierrot 2.0

Hi! Firstly, I'd like to apologize. What kind of a costume/Halloween fanatic DOESN'T MAKE A NEW COSTUME EVERY YEAR??? Where have I been? Why didn't I post in March announcing this year's costume? Well, to tell you the truth, this past year has been pretty hectic for me. Primarily, I started college this fall, which at the beginning of the year made me think that I wouldn't really get a chance to dress up. But it turns out that my college has trick-or-treating on campus, and I really couldn't pass up the chance to get dressed up on Halloween! I mean, it's impossible for me not to.

A closeup of the makeup.
So. I decided to revisit my Halloween Pierrot, this time trying a more Pierrot-like face instead of a skeleton one, as I felt that the skull face had a sort of death metal vibe that I wasn't really going for.

I started this time with the same face painting kit I used last year, except this time I used regular old makeup for the eyes, to give it that smoky, subtle look that I could more easily articulate (the face-painting crayons that came with the Dia de los Muertos kit were very thick and it was hard to draw thin lines with them.)

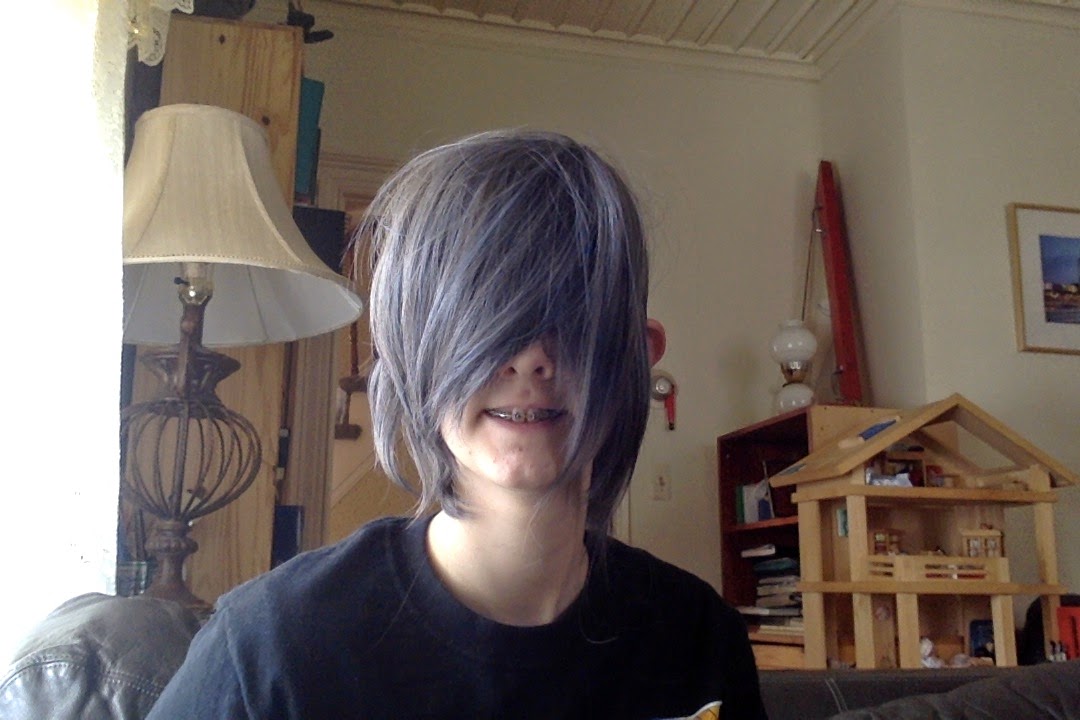
I also pared down the accessories of the costume quite a bit this year. I ditched the boots for high tops, the wig for my own hair (which right now is about the length of the wig, anyway) and, sadly, the hat, because I forgot to bring pins to pin it to my head (it doesn't stay on very well otherwise.) It just so happens that I own a dark grey flat cap, though, and I feel that it didn't detract from the costume at all—just gave a different feeling to it. I'd say a dark-colored or red beret or flat cap works fine for this costume if you don't want to spend the time making the hat.

Anyway! To the review!

Recognition: 5/10

I mean, honestly, only one person actually guessed, but they guessed right! So that was fun, haha! But before Halloween, whenever anyone else asked me what I was going to be, and I told them "Pierrot," they didn't know what I meant and I had to amend that response with "a sad clown." So, 50/50?

Strength: 10/10

Without the hat to fall off, this costume had no problems construction-wise.

Comfort: 9/10

This was the first Halloween in a while where I wasn't freezing. The bagginess of the shirt and pants allowed me to wear lined jeans and a long-sleeved t-shirt under the costume, making it very toasty! The only annoying this about this costume, I think, are the gloves, because I had to keep taking them off to take pictures and look up the trick-or-treating route with my phone. (Also the pants have no pockets, so I had to put my phone in my trick-or-treating basket.) Aside from those minor details, though, super comfy!

I promise that next Halloween I'll have a new costume, now that I know I'll have the time/opportunity to wear it! Stay tuned for updates, and

Happy Halloween!


Wednesday, November 1, 2017

2017: How It Went (Halloween)

Happy Halloween Pierrot!

Hi!

So, as I mentioned before, I didn't have a trick-or-treat-ing Halloween this year due to a course I'm taking, but I did get to wear my costume, so I still have pictures of the finished Pierrot!

The finishing touch of this costume is the makeup, which I winged last night without any practice, so it could be a lot more precise. Here is a closeup of the makeup:

The makeup.
I used a Dia de los Muertos makeup kit, which included white base color and three makeup crayons in red, green, and black (I only used the black, though I went over that later with a crayon eyeliner because it wasn't defined enough). 
The sponge brush that was included in the kit worked best if I patted instead of brushed it on, as that  blended the makeup better. I figured this out the hard way (when I brushed it on, the makeup was VERY blotchy; every time I applied more, the motion of brushing would rub the surrounding makeup off).
I tried to do the nose the way I had envisioned (click here to see my original design), but it didn't look very good, so I just left it blank.

I sort of like the costume without the full skeleton face, though, so maybe next time I'll try a more subtle Pierrot face instead, maybe with dots under the eyes instead of spikes.

Anyway, 'till next Halloween, and Happy November!


Monday, October 16, 2017

Pierrot: The Hat (and Pom-Poms)

The finished Pierrot costume (without makeup)

Pierrot is done! I am very, very happy with it!
The above picture is the finished costume without the skeleton makeup (I'm saving that for Halloween.) 
Unfortunately, I might not be able to post a Halloween review, since I'm going to be missing the bulk of my city's trick-or-treating hours due to a course I'm taking, but I think I'll still wear the costume that night, so I might post a review of it anyway.

So, on to...

The Hat

I like making hats. This hat was very fun to make, as it only required a few steps, and only cost $6.85 for the materials.

Anyway, I started with a piece of leftover vinyl for the pattern, but a large sheet of paper or cardboard would do just as well. Here a sketch of the pattern I made:


The hat pattern.


I basically winged it when it comes to shape, I started out with the highest hight and widest width possible (the sheet of foam I got for the hat was the 12''x18'' kind, I think, which means that the brim is 18'' wide) and kept trimming the height down until I liked the length. The brim is too small for my head, so I am using pins to attach it to the wig, but if you can find wider foam that might be better.
Be sure that the top of the hat doesn't come to an exact point, but is 1 or 2 inches wide (this will make it so that the veil can go through the point of the hat.)*

After I figured out the pattern, I cut the foam to it, taped the seam up, then glued felt over it. I made a mistake in the method I used to cover the hat in felt— I rolled the hat onto it while gluing it in place, and so there was a tiny slice of the foam that wasn't covered, but I patched it up with some of the rest of the felt, and since it's in the back, the veil will cover it. Anyway, instead of being silly like me and rolling the hat on the felt in an imprecise manner, I would recommend cutting the felt to a slightly enlarged hat pattern and then attaching and trimming it.

Then the fun part! I glued three black pom-poms to the front of the hat and wrapped some of the bat-patterned tulle around the brim, then fed a strip of the tulle that I had knotted at the end through the hole in the point of the hat (the knot should be hidden inside the hat.)

I also sewed the larger pom-poms onto the shirt, which is a small edition, but really completes the look!

Well, that's all for today.

Happy Halloween!


*Edit Apr. 2018: I now realize that this way of making the hat was going extremely out of my way! To make an easy conical hat, just cut the foam into a circle, draw a radius of that circle, and cut along that, so that there is a split on one side of the circle. Then, overlap the two flaps on either side that the split has created, until it looks fairly conical. Glue the overlapped pieces in place, and then you're done! :)

Saturday, September 23, 2017

Pierrot: The Shirt Collar

Collar, wig, and gloves implemented!
Hi!

Well, the shirt is almost done! That's exciting!

The collar is made of a very long rectangular strip of cloth (about 50'' long and 10'' wide), which was made very similarly to the neck of the shirt— we used the same cinching technique (a shoe lace threaded through the top hem), but we made the collar wider than the shirt neck so that it would bunch up more.

Then, for a Halloween-y flourish, my father sewed this cobwebby-bat-themed tulle that we had left over from another project in pleats inside that collar while it was un-cinched, and then we scrunched it up again and voilĂ ! A perfect Halloween finish. We left the back unfastened, but you could also sew it up, which will make it less likely to pop open in the back. Now the only thing left to do on the shirt is the pom-pom buttons!

Because the shirt was coming together, I went ahead and tested out the wig (reused from my Ciel Phantomhive cosplay) and black gloves (also from my Ciel cosplay!) — I'm very happy with how the wig looks, I like the longer length for a Halloweenish Pierrot! The gloves also pick up the black in the ruff and, in the future, the pom-poms, which is good.

That's all for now! Happy Halloween!

Pierrot: The Body of the Shirt

Pierrot's Shirt

Hi! 

So, my father used the patterns we figured out the other day to make the body of the shirt, and it looks pretty great! I'm very pleased with the shape. 

As you can see, we extended the sleeves a little past the hemline of the shirt to give it a more floppy appearance. We also widened the body of the shirt from the (already widened) pattern by about 4 more inches, but even with all that widening, I would say that you could widen it even more if you wanted it to look really billowy.

The neck.

The picture on the above is showing where the drawstrings for the collar are positioned inside the shirt.  They are in the hem of the collar and come out in the back on the inside of the shirt. Then you just pull the strings and tie, and you have a lovely scrunch!

I could just leave the shirt like this, because it looks pretty good, but I'm also going to have a collar, which will be discussed in the next post, and some fun pom-pom buttons!

Happy Halloween!


Wednesday, September 20, 2017

Pierrot: Designs and Shirt Pattern

Design 1
Design 2


Hello!

Above you will see the two designs I created while brainstorming what I want the costume to look like. The finished product will mostly be design 2, except for the shirt, which will be design 1 but with pompoms or red roses for buttons. The makeup in design 1 is basically what I'll be doing, but I won't be adding the tear in the final makeup because it conflicts with the spike accents on the eyes and makes it look too busy.
I'm also going to be wearing black gloves, and black pointed boots (the heeled Victorian kind that you can find in costume shops. ) I'm still deciding on the trousers, but it's between black leggings and the white scrub pants that I used for my Near cosplay.

We're just using a large white sheet for the fabric of the shirt. My father and I worked on the pattern for the shirt yesterday, which we based on this adorable child's smock pattern. (If the link doesn't work, look for a pattern for an art smock that has long raglan-style sleeves.) It's a really simple pattern, and since the final shirt will be so big and billowy, there is a lot of room to make mistakes!

That's all for today.

Happy trick-or-treating!


Monday, February 27, 2017

2017's Costume: Halloween Pierrot

Hello!

I was somewhat torn between being Quicksilver (from the new X-Men movies, not the Avengers movies), or Pierrot (the "sad romantic" stock character from pantomime), but I decided that I want to try designing and making a costume all by myself (in the past I have been helped a ton by my parents), so in the end I picked Pierrot!

My concept is to bring out the melancholy aspect of Pierrot, with some Halloween themes thrown into the mix. This way I can design my own "look" for this character.

I plan on using spider, cobweb, and skull motifs for the materials and makeup, plus Pierrot's classic white blouse, ruff, and pom-pom decorated cone hat.

I'm very excited to start working on this project! Hopefully it will turn out okay.

Happy Halloween!

(edit 9/20/17: Actually, my father is going to help! Haha, guess I backed out of that one!)

Sunday, November 6, 2016

2016: How It Went (Halloween)

Real Live Music!

Hello!
This year was pretty fun. I decided I would only give out candy— the first time I haven't trick-or-treated on Halloween ever, and it was surprisingly fun.
I play the harp, so I sat in the yard and played music whenever the trick-or-treaters came by. That was extremely fun.
Anyway, on with the review!

Halloween Night.
Recognition: 5/10

Well, they got the basic idea. I didn't get many guesses— there weren't many trick or treaters to guess— but the closest was probably "An Elf from Minecraft." Which, you know, kids these days (yes, I do say that ironically.) The other guess was "a Nymph" which is a little further off, so I'll go with the former as the closest. A lot of people (at least 3) wondered if I was real, and were really creeped out for some reason. Not my intention, but it was funny. :D

Strength: 10/10

Great. Everything was perfect, because it was sewn by someone else!

Comfort: 4/10

The outfit itself is very comfortable, aside from the wig pinching after a while (they tend to do that.) The real problem was with the fact that it was October, and I had assembled the costume in August, due to a trip to the UK my family and I were taking for the bulk of October. Anyway, my point is, it was cold. VERY cold. Mostly my hands were frozen, but that was a problem, because it made it hard to play the harp. So, not the best costume for cold weather. Maybe go with an elf-garb that has fur on it or something.

I'm not including candy this year, because A) it has nothing to do with the costume, and B) we bought our own candy this year because nobody was trick-or-treating in our house.

There were more people in costume this year from what I could tell, so that's good. It always makes me a little annoyed when they don't dress up.  Anyway, it was a good year.

Happy Halloween!
(Also 5th of November. Remember, remember the 5th of November... ahem.)

Tuesday, October 4, 2016

Silvan Elf: Finished!

Fall is here!
Hi!

So I actually bought a dress and ditched the whole pajama thing, which I'm happy I did, even though it cost me $30, which made this costume cost much more than I wanted it to, but at least it looks good, heh heh!

This photoshoot was not so big and long as the Ciel one was, since this costume isn't as much of a big deal, but I figured I'd post some pictures anyway, because I like elves.

You can check out more photos on my DeviantArt page. Link in the "Welcome" bar!

HAPPY Halloween!

Monday, August 22, 2016

Silvan Elf: The Wreath and Dress Base

The wreath.
I made the crown/wreath! I used fake foliage and flowers from Michaels, but you can basically find this kind of thing in any large craft store. I actually found a ready-made circle of fake leaves, so I just tied or weaved the other flowers into it using their stems, which sometimes had wire in it, or in the case of the flowers, I pulled them off the stems and tied them on using the leaves, which I also pulled off the stem.

Also, if you want to use real flowers, that's wonderful, if not better! I was just lazy.

The shirt of the pajamas. (Excuse the
bad photo, I didn't have a camera
so I used my computer webcam. :P)
I also got a velvet pajama set for the dress that needs a lot of work because it has pants that need to be turned into a skirt as well as it being two separate pieces instead of just one, but I liked the fabric and it was cheap. I might continue looking to see if there's anything better, but I think it'll
do.

Other details I got/have include ribbon for the sash and a pin that I may or may not be using in the costume.

That's all for now!

Saturday, August 13, 2016

Silvan Elf: The Ears

Got the ears!

Hi!

I just got the ears and I'm very happy with them. They match my skin color almost exactly and are a bit translucent, so they look fairly realistic. I got them at my local costume store.

In the picture I'm wearing the wig I'll be wearing -- it's the same one we used for Undertaker, which saved some money, haha.

I'll also try to look for a dress today. I'm thinking of getting a long velvet dress that's pretty plain so I can decorate it, but if I find something better, then I'll do that. It's a very different approach from most of my costumes.

That's it for today.


Thursday, July 7, 2016

2016's Costume: Tolkien Elf

Hello!

I was going to be Junko Enoshima from Danganronpa, but then I decided that I'd rather be an Elf, because I recently (this year) got really into the Lord of the Rings movies, and now I'm reading the books, and part of me has always wanted elf ears.

So now I'm going to be an Elf!
A Silvan Elf, to be exact, from Mirkwood. No specific character, which is new for this blog! Yay! Milestone!

Obviously I don't have any pictures yet to show what I'm going for, but hopefully I'll have some sketches nearer to when Halloween is. I'm planning on being thrifty for this costume, so I'll most likely just look around Salvation Army until something strikes my fancy. I do have a nice idea for a crown involving plastic foliage and flowers, though, so that's something.

Anyway, that's my announcement.

Happy Halloween!

Monday, February 29, 2016

2016's Costume: Junko Enoshima

Ahahahahahahahaaaa!
Hi!
I'm a little late this year in deciding (Whoa! It's almost March!), but I've finally picked my next costume, and I'm kinda excited:
Junko Enoshima from Danganronpa!
It's a fairly simple costume, and I already have some of the pieces, and that's good because I don't want to spend so much money this year on costumes.
I think the hardest thing I'll need to get is either the wig, as it is a strange shade, has high pigtails, and has a tendency to sell for over $30, or the over-shirt, which will be a black shirt that I'll need to alter a lot.
More updates coming soon!
Or not so soon.
Probably not so soon.

Tuesday, November 3, 2015

2015: How it Went (Halloween)

Ciel and Undertaker on Halloween!

Hello!
So, this isn't really a Halloween blog any more, but I figured I'd keep going with the Halloween reviews, because Halloween's great, so why not?


Recognition: 4/10

During the trick-or-treating, nobody knew who I was supposed to be, and I got one guess that was a joke. So, I was feeling like it was a not-very-good-year-for-recognition. Then, I went home and passed out candy, and five people recognized me, one of which was a big fan. Cool!

Strength: 9/10

Very good, just two things, the boot ribbon started to come undone, and the ribbon on the cane kept coming undone. Ribbons! Ahhhhh!

Comfort: 7/10

I was much warmer this year than I've been the previous years, so that was nice. But, the boots were very uncomfortable, and the pants kept riding down, while the shirt kept riding up, so I constantly had to adjust everything.

Candy Rating: 7/10
Well, I  gave away most of it, but what I kept I liked! (hint: almost everything I kept has chocolate in it)

I liked this Halloween. I've never given out candy before, and I found it was very fun. There was just one thing that annoyed me, and that was that there were more people who weren't wearing costumes than people who were, and that just baffles me. What's the point of Halloween if you don't dress up?!

Anyway...
Happy Halloween!

Monday, June 15, 2015

2015 How It Went: AnimeNext

Madame Red (my mom), Ciel (me), and The Undertaker (my brother) :D

Hello! I had a lot of fun at AnimeNext, it was by far the best in the "social" aspect of conventions. Well, since there's not much to say, let's get to the review!

Recognition: 10/10

I am REALLY happy about this. We were getting stopped about every two minutes to have our picture taken, and we spotted many other Black Butler cosplayers as well. It was super fun taking pictures with them all, and it was also fun looking for Sebastians to complete our Madame Red, Undertaker, and Ciel. I hope next year I can choose a cosplay that will also lead to such interesting interactions.

Strength: 7/10

Aside from a few buttons coming loose (my bad sewing job), the ribbon on one of my boots coming undone (I'll fix it for Halloween), and the pants sort of ripping at the crotch after a while (the result of stiff fabric and not building in room for crouching), nothing broke at all, and in general it held up to the stress of walking around for a long time.

Comfort: 5/10

The costume itself is pretty comfortable, the problem really lied in the heat, which was devastating. I had to change halfway through the first day, and though I made it through the second, it was still pretty torturous. I guess that's what happens when you wear velvet in 90 degree weather. Aside from that, the shoes were a bit uncomfortable after a while, but that's something that can't really be fixed.

Con Rating: 8/10

Enjoyment of the con is 9/10, but I must deduct a point for the poor programming. For one, they never keep their website updated, which is a major problem for people who don't have Twitter. Also, the paper schedule was rendered somewhat meaningless after a while due to scheduling conflicts, so if you didn't have the app (which we couldn't get due to iTunes problems,) you couldn't be updated on the goings on. This lead to us going to a panel that was very falsely advertised for nothing.

Even though it had a few problems, though, I really, really enjoyed myself, even if it was just to hang around with other Black Butler people (which, by the way, is very rewarding.)

Till the next time!


(P.S. If you took pictures with us at the con, comment here or on my DeviantArt page and I'll follow you! :D)

Sunday, June 7, 2015

Ciel: Photos Are Up!

It's done! Woohoo!

Check more of them out on my DeviantArt page (link in welcome bar)!

Happy AnimeNext!

Saturday, May 30, 2015

Ciel: Finished!

The (pretty much) finished costume!
The back.
Hi!

I am basically 95% done, so I thought I'd just post about that! Yay!

I am very, very happy with how it turned out!
In a few days I'll do a makeup test and post more pictures on my new DeviantArt page, which I'll link to here!

Happy AnimeNext!


Saturday, May 23, 2015

Ciel: The Coat So Far

The costume so far.


Hi!

So I thought I'd post how the coat is going, just to show how it will look roughly. It's mostly done, all we need to do now is the sleeves.

Most of the coat was pretty hit-or-miss in the pattern department, if I had to do it again, I'd probably modify a pre-existing pattern.

It's pretty hard to see the detail in the photo, but hopefully the "good camera" as we call it, will capture a bit more of those lovely details!

Monday, May 4, 2015

Ciel: The Pants

I'm not wearing the
black stockings in
this picture, but they
make the pants look
very professional :D

Hello!
As you can see, we have finished the pants, and I'm very pleased. We did kind of make a mistake buying fabric with no give, but it somehow works, so that's the most important thing! This is the first part of my costume to have been sewn by a machine (not including the mock-up of the coat.)

Also... I got the gloves and one of the rings (the other is coming sometime this month,) and I decorated the cane some time ago, but I just wanted to share this picture, because I like it. So there. :P

I'm thinking of doing more Ciel cosplays in the future. If I do it will probably be his blue casual outfit for a "Detective Ciel" cosplay.

That is all for today.
Oh, yeah, May the 4th be with you.

Thursday, April 23, 2015

Ciel: The Wig

Hi!

When I ordered the wig, I knew I would have to cut it because in the reviews section of Amazon, they all said it was too long. When I got the wig, it looked like this:

Cool, but more like Undertaker than Ciel.
Then I cut it. It was my first time cutting a wig. Actually, it was my first time cutting hair at all, but I am very happy with the result!

Me wearing the cut wig. (LOL you can see the hair on my shirt ehehehe)
I basically just grabbed sections of the hair, then cut with the scissors pointing up, to get that layered look. For cutting the back, I put it on a teapot as a form, because we don't have a foam wig stand.

Here is a picture of the wig with the hat on, the way it will be in the final costume:

Happy happy happy. Okay.
That's basically it for today. :D